Tips On Taking Your Own Product Photographs
For those who have got their new website up and running and installed with e-commerce facilities, it is now a good time to start taking photographs of your products.
You have two options, if you are lucky enough to be based near Ayrshire, contact me and I can arrange to photograph your products for you or alternatively if you are further away or a budding photographer yourself I can share some tips that will help you take better photographs of your stock and you don’t need to know anything about photography!
Getting Geared Up
Here are some useful household items that can become great tools to help you take great photographs of your products.
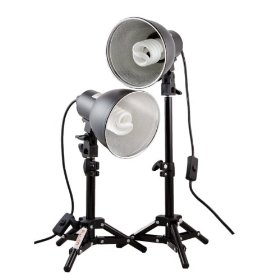 Desk lamp: You can purchase a photography specific lamp from online stores such as Amazon or eBay. Whilst not being as versatile as proper photographic lighting, for most intents and purposes they do a great job for a tiny fraction of the price of a studio lamp. Pay attention to the colour temperature of the bulbs, you are looking for a bulb that is rated to produce clean white or daylight temperature. On Amazon there are currently a pair of mini lights for £23.00 which would suit the needs of most people.
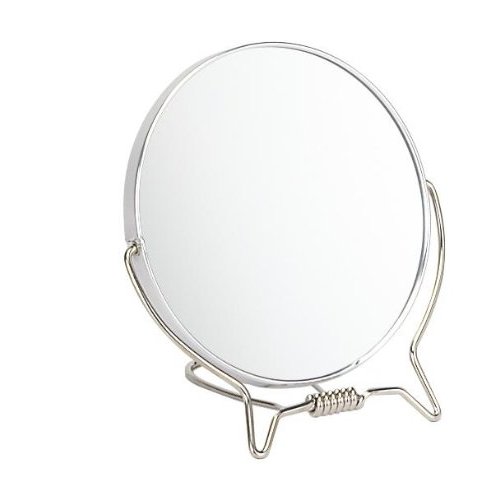 Mirrors: Professional photographs are taken using diffusers and reflectors to balance and soften shadows but it is entirely possible to do this job simply by using make up mirrors on rotatable stands. When you project your light onto your product and you notice harsh shadows (depending on how many lights you use) you can introduce a mirror by placing it out of the shot and using stray light to reflect back onto the shadow area which will work to reduce the deep shadows you see.
 Card: Similar to the purpose of the mirrors, card provides a softer diffusion (spread) of reflected light. By propping up sheets of card to reflect back stray light you can light opposite sides or dark areas of a product without using another light.
Plain White Wallpaper: Roll the paper out long, cut it free and then you can use clothes line pegs or tape to stick it to a wall or large object and ensure that you have a nice flowing drape that has no folds. The larger the curve you create, the less you will see any noticeable difference in the background shadows of your setup.
Sticky Tape and Pegs: These will be helpful for holding back paper, tying loose ends away and attaching card to help with placement.
Setting The Scene
You should aim to avoid your photographs that look like your product was casually snapped lying on the shop floor or on the floor of your house.
This may be fine for eBay but you have to raise the game for an e-commerce website. You want all the attention to be on the product and not the objects lying about beside it so you need to isolate the product from all background objects.
Choose an uncluttered area to do your shots. If you are capturing a large product such as an ornament that is very large, ensure that you sweep and clean the surrounding area and choose a plain wall or the most non distracting background you can find.
If you are shooting something small enough to sit on a table and you want the classic white background effect. You can make one yourself using a roll of non textured plain white wallpaper which I’ll discuss this later in this article.
The Lighting
 A photographer’s job is to work with, manipulate and sculpt light to fit the scene. Without light there is no photo! Light has the power to create mood and appeal towards your product. Get it wrong and the shot will look unappealing, get it right and people will be more likely to want to buy it.
Natural light from the sun is unpredictable at the best of time, especially in Ayrshire where you can start shooting in glorious sun and finish in the rain in only an hour.
If you do not have any lighting available over and above the room light or the window then all you can do is position your set up in a way which will maximise the light falling on your products from your window or using the room’s own lighting.
Using the desk lamps as mentioned before, there are many ways to plan the lighting.
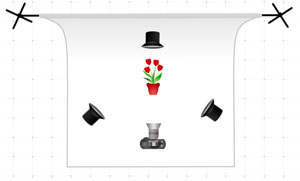
 The most common set up involves using two lamps placed at 45 degree angles to the product, lit from the front and elevated vertically whilst pointed down. This helps define the product and avoids the unwanted look of an object with a dark and light side which will occur from a single light source.
As the 2 lights are crossing at the same angle they will be working together to cancel out each other’s shadows. The vertical lift means the shadows appear low on the background and minimised in distance away from the product.
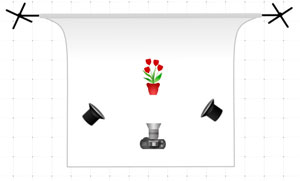
 If you are lucky enough to have 3 lights, you can place the third in the air shining straight down and slightly backwards behind the product onto the curved sheet of paper. This helps to make the product appear totally isolated on a white background and avoid heavy shadows.
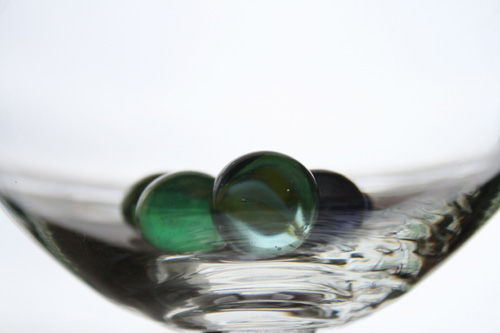
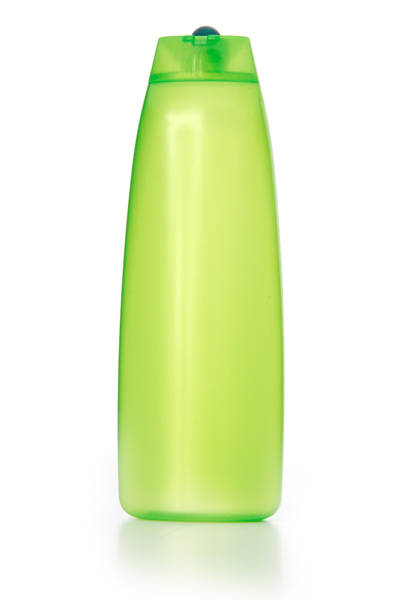
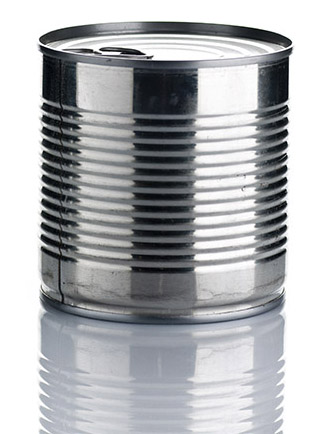
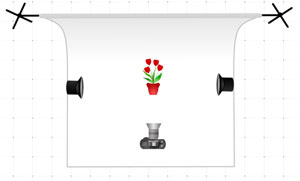 Cross-lighting is useful for reflective products and requires the 2 lights to be placed at 90 degrees to the product on the extreme left and right. Glassware and cylinders work well using this technique.
Using these set ups you will be able to photograph the majority of products and with the addition of card and mirrors you can further illuminate certain areas of the product and reduce any shadows which are distracting in the shot.
 Remember: Dedicated photo lamps have a light colour of pure white. If you are not using photography specific lamps or bulbs, you may experience yellow, green, orange or blue colour casts on the whole photograph. This is known as ‘White Balance’ and is what your camera will be attempting to correct but may get it wrong. If you are not familiar with photography software to be able to remedy this, I would highly recommend purchasing photography specific lamps that will produce white light every time.
Your Camera
You won’t need thousands of pounds worth of kit. Professional camera equipment will obtain the utmost quality but for those looking to take their own photographs you can create perfectly good shots by learning from the pointers on this page.
It doesn’t matter whether you have a cheap compact camera or an expensive D-SLR or even if you are using a mobile phone, the simplest things that can improve your photography results are mostly free or can be sourced cheaply.
Stability, First Priority!
 Camera blur comes from shaking whilst taking a picture. In a dark environment the camera shutter needs to remain open for a longer period of time to gather enough light. Most people cannot hold a camera steady enough when the camera is using a slow shutter speed.
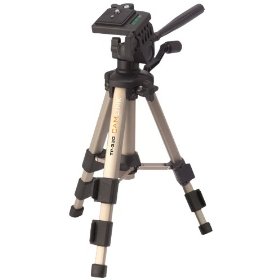
This is where a tripod comes in handy and is the single best thing you can possibly do to improve the quality of your shots. If you are lucky enough to have a tripod, you are one step closer to getting razor sharp pictures.
If you do not have a tripod, you can create one by using books, a box, a chair or anything that can be set high enough whilst retaining a stable surface to place your camera on. If you need to tilt the lens you can use coasters, pieces of cardboard or a towel to prop the back of the camera up or the front of the lens up depending on which angle you wish to achieve. You just need the camera resting without any wobble.
For very little money you can purchase desktop tripods from camera shops although I find that they are often not sturdy enough to support heavier cameras with the exception of the Joby Gorillapod.
Taking The Shots
 Finally, you should have your scene set up and also your lighting too. You are ready to take your pictures now.
The first thing you should do is turn off your camera flash. The flash from your camera should not be used in product photos. It will ruin the look of the shot and the careful lighting set up that we have achieved earlier.
For those who are confused by photography terms and would be unwilling to try and adjust the settings of your camera, that’s fine.
You have 2 options that I would suggest…
- The first is to use Auto Mode. Automatic mode can produce photographs that are slightly inconsistent when it comes to how they look as the camera will be readjusting its settings between each shot but will be good enough to get the job done anyway.
- Or pick an Indoor Scene Mode or preferably macro scene mode if it is an option. Macro mode will cause the camera to use its close focusing technology which is what you will use when doing product photography.
For those who are looking to adjust their own settings in their camera and their camera allows you to do this. I would recommend Aperture Priority Mode if your camera supports it. This will allow you to set the ISO and Aperture to what you desire and the camera will aim to create perfect exposures by adjusting the shutter speed to suit.
The settings you will adjust are: Aperture and ISO level and here are some tips on which settings to choose.
ISO: This is the term for how sensitive your camera sensor will react to light. Low settings such as 100-200 ISO work for bright lit scenes and increased values such as 1600-3200 ISO plus for dark scenes.The trade off is image quality as high ISO settings create speckled grain and noise in your picture. As you are using your own lighting which should be bright enough, choose 100-200 ISO because we want the best quality and no grain or speckles in the finished photo.
Aperture: (Measured in F stops ie. F2.8) The aperture affects how much of the product will be in focus at the trade off of less light reaching the sensor meaning longer shutter speeds. A good setting for product photography would be anything between F10 and F32. If the lights aren’t too bright, go closer to F10, if you have plenty of light try close to F32 if your camera allows it.
Shutter Speed: (Measured in /seconds) The shutter speed will be chosen by the camera if you use Aperture Priority mode. Most cameras will do a great job if they meter the light levels on the scene correctly. If your shutter speed is so low that the shutter is open for longer than a second or two, you may want to either decrease the Aperture (ie. F22 to F10) or increase the ISO (ie. 200 to 800) but this should not necessary if the scene is well lit.
Further Tips on Product Photography
Now that you know a little more about product photography here are some of the most important tips that I’d like to share with you to save time and increase the quality of your photographs.
- Always clean and blow away any dust from objects. What takes you a few seconds to fix in real life can take several minutes in Photoshop and if you don’t have any editing software, then the shot will look bad.
- Pay attention to stray reflections. On anything shiny always check what may be appearing in the reflections and adjust the camera or object to prevent this.
- When focusing close up, in addition to always using your tripod, you should set up your camera on a stable surface and use the timer mode to shoot. That way the simple act of pressing the shutter button cannot jerk the camera and cause blur.
- Check the focus after each shot by zooming into the image on your camera and checking that it has not blurred or missed focus.
- After shooting and resizing the images for web use, always keep the full resolution images on disk in case you decide to produce a flyer in the future, you still retain images large enough for print.
- To create wonderful reflection beneath a product, place a sheet of perspex or glass underneath. This will enhance your product’s shot no end for very little money.